I recently migrated a Windows server to AWS and realized that the disk size on the root volume was was way too big for the utilization. So, what I thought I could do was reduce the volume size in Disk Management and then reduce the EBS volume size. Unfortunately, AWS does not allow for reducing the size of an EBS volume.
In this post I’ll shrink the root EBS volume for a Windows server I’ve migrated from on-prem (I created a video on how to migrate a server from on-prem to AWS here.) Then from a second Windows instance I created, attach the EBS volume we want to reduce and copy the partitions to a smaller EBS volume using tool called Active Disk Image. We’ll then reattach the root volume and boot the migrated instance.
Server1 = Server we’ll use to copy partitions from overprovisioned disk to 100GB EBS volume
Server2 = Migrated server from on-prem with 250GB root drive
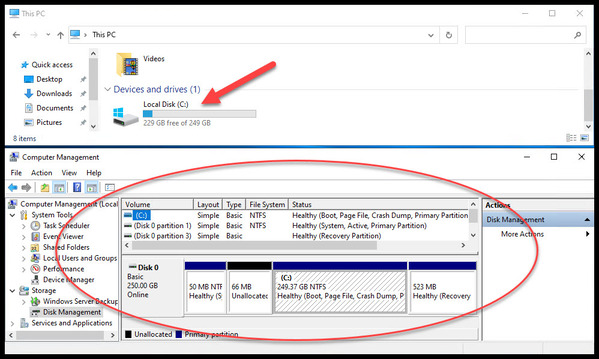
Here is a screenshot of the original disk after migrating server to AWS. Notice we’re only using about 20GB of a 250GB drive.
The next step is to create a new EBS volume at the target size we want. The original disk is 250GB so we’ll create a new volume at 100GB. Encryption at rest is always a good idea. I’m applying encryption during the creation of this volume. Make sure the instance type supports encrypted disks.
The next step will be to attach this new EBS volume to a server (Server1). We’ll use this server to copy the partitions from our oversized volume to this new one. (Device name doesn’t matter. Just choose an available name and make note of it.)
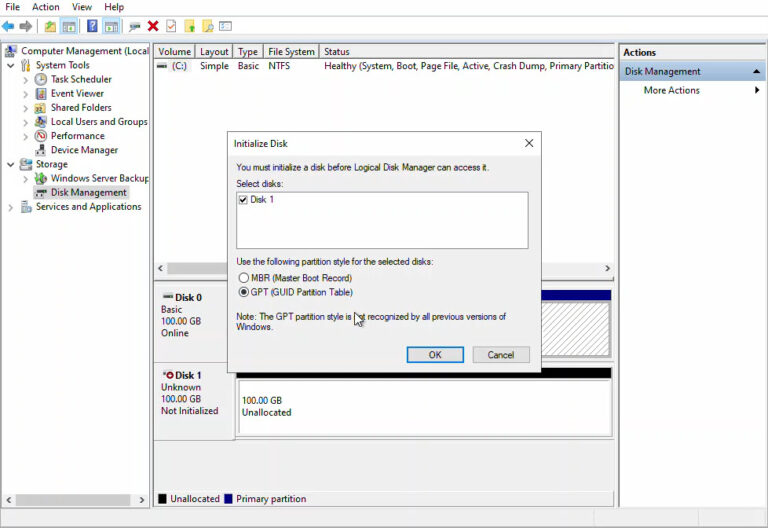
After attaching the volume go into Computer Management on Server1 and choose Disk Management. Choose to rescan if you don’t see the new disk then choose GPT for partition style and hit OK.
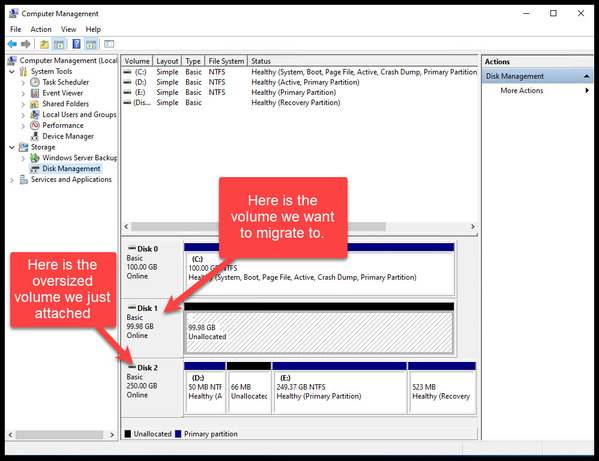
Next, we need to shutdown Server2, the one we migrated to AWS, disconnect the oversized volume and attach to Server1. Again, when you attach the volume the device name doesn’t matter just choose an available name and make note of it. (Make note of the root device name on the AWS console first. If it’s the root it should be /dev/sda1)
Let’s verify that the disk was attached to Server1.
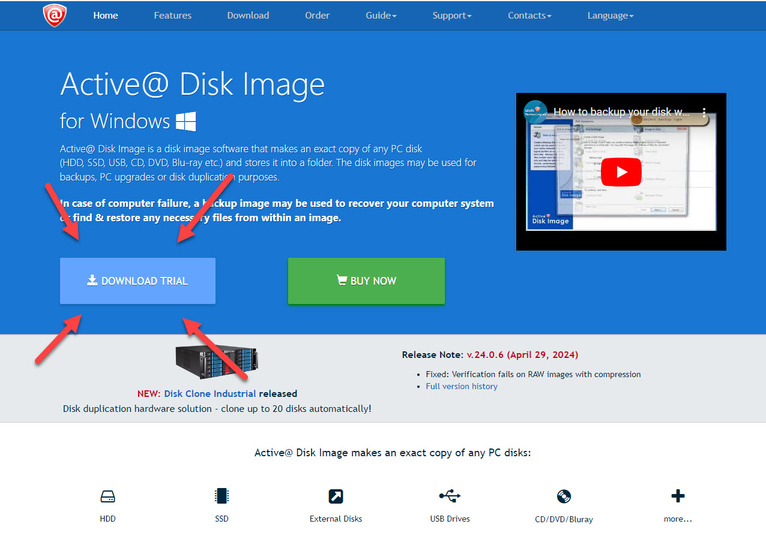
Let’s now install Disk Imaging software from here. The trial version will work fine for us. After downloading run the install file and go with the defaults. Choose Continue at the end.
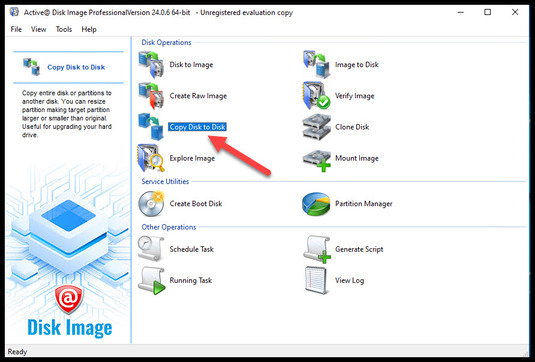
After installing Active Disk Image software on Server1 double-click “Copy Disk to Disk”.
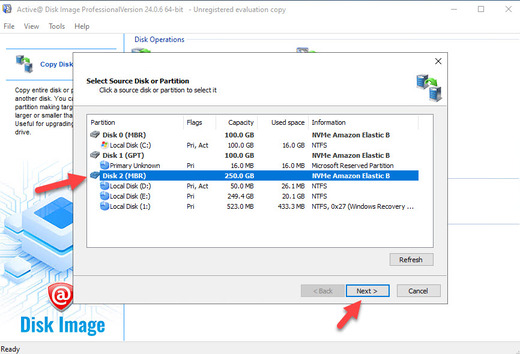
Now we need to choose the source disk. This would be our 250GB disk and choose Next.
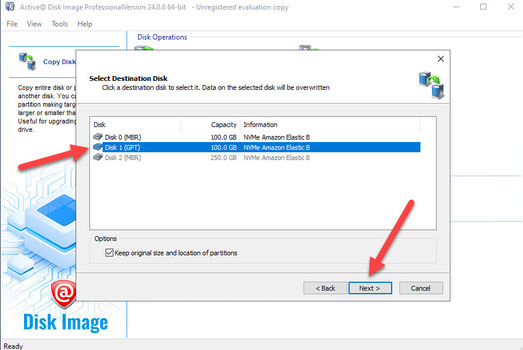
Choose the destination disk, which in this case is the 100GB drive then choose Next.
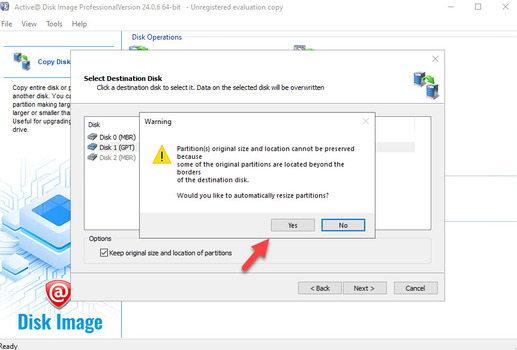
Before you proceed double-check to make sure you have the correct disks selected. Then choose Yes to resize partitions.
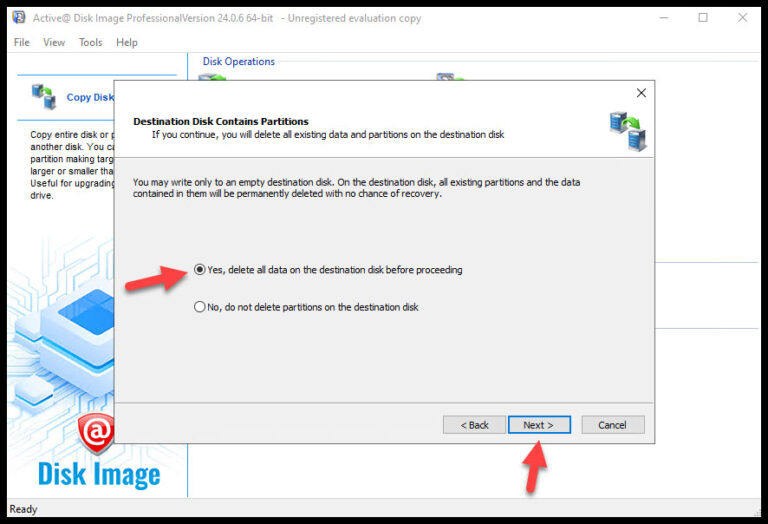
The next screen is important. We need to delete the data on the target disk. If you have the wrong disk EVERYTHING will be deleted. If you’re sure you have the correct disk choose Yes, then Next.
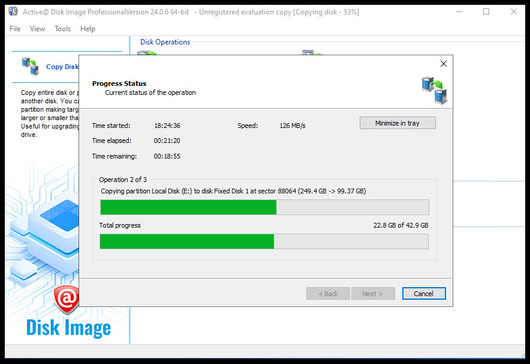
After you choose Next you’ll see a status bar. It can take hours (mine took 25 minutes), to move partitions and resize depending on the size of your disks, so kick back and watch the magic.
After the copy completes we need to shutdown Server1, detach the 100GB disk and attach to Server2. If all goes right we’ll have a resized EBS volume. (Make sure Server2 is shutdown before attaching the new EBS volume. Remember, if it’s the root volume the device name will be /dev/sda1)
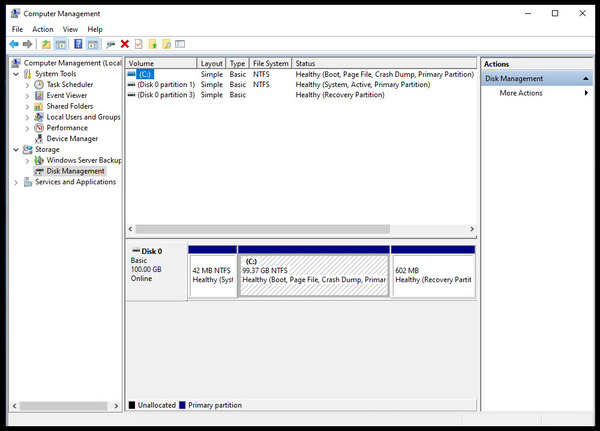
Now, power up Server2 and check the disk size in Disk Management.
That’s it. It’s a wrap!
In this post we created a new 100GB EBS volume. We detached the large EBS volume from Server2 (migrated server), attached the 100GB volume and the large volume to Server1 and copied the partitions from the larger volume to the right sized volume using Active Disk Image software. We then attached the right sized volume to Server2 and verified that we could boot Server2 and verified the disk size in Computer Management.
Note: Don’t forget to delete Server1 if you only used it for this procedure. Same for extra volumes.