If you manage a handful of servers then OS updates can be done manually, but if you manage hundreds or thousands of servers then that's a different story. You need an automated response to server updates. Enter Patch Manager, an AWS service that allows for patching Windows, MacOS, and some popular distros of Linux. In this blog post I'll walk you through setting up Patch Manager and how to monitor update installs.
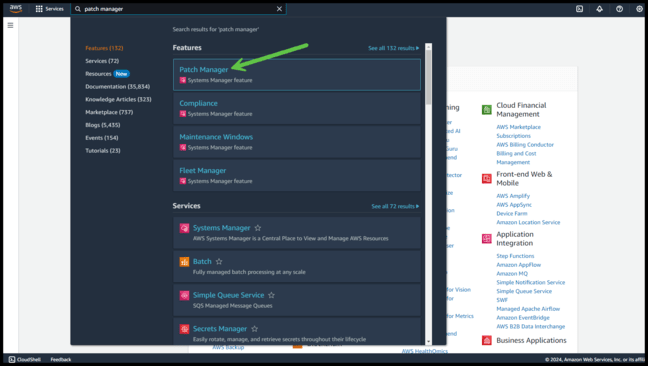
After logging into AWS we need to search for Patch Manager.
Click on Patch Manager to navigate to that page.
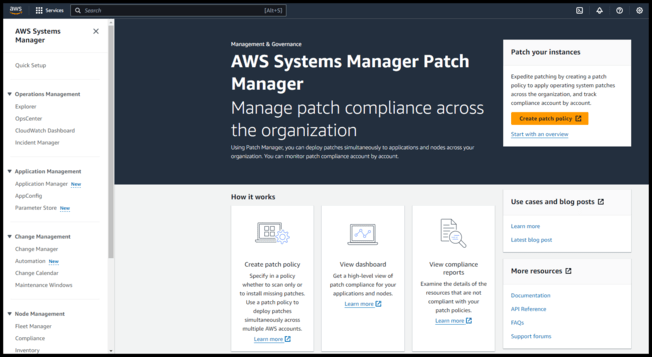
If you haven’t setup a patch policy you’ll see this default screen.
Choose "Create patch policy"
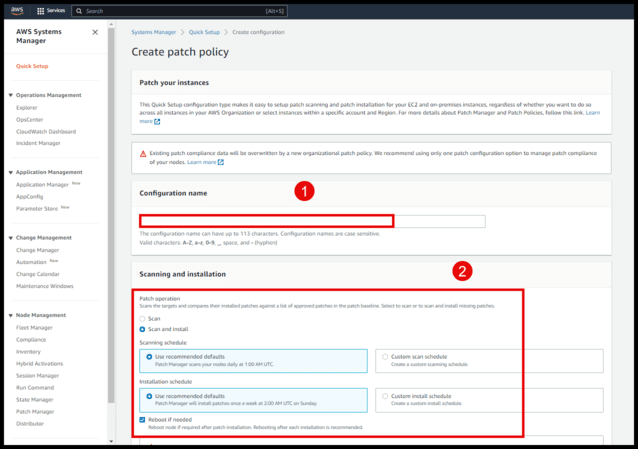
The first two fields we need to enter are the Configuration Name and the Scan/Install options. I’ve chosen to scan and install the updates with the default schedule (1amUTC and 2amUTC, so make sure this is a good time for you; otherwise choose a time that works for you)
Note: I chose to reboot if needed. This might not be possible for production servers.
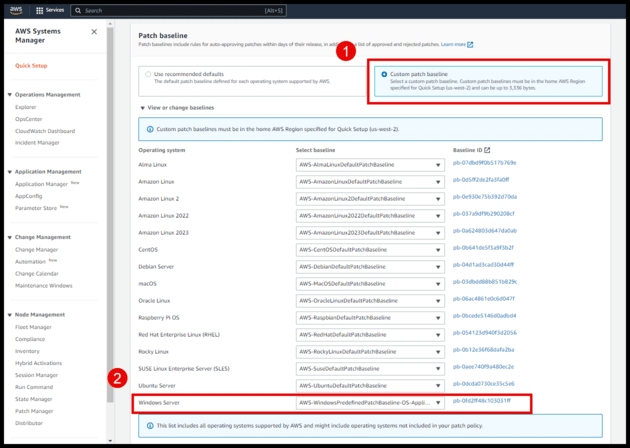
The next option is patch baseline you want to use for your patch policy.
You're given a list of OS's. For Windows Server I chose "AWS-WindowsPredefinedPatchBaseline-OS-Applications"
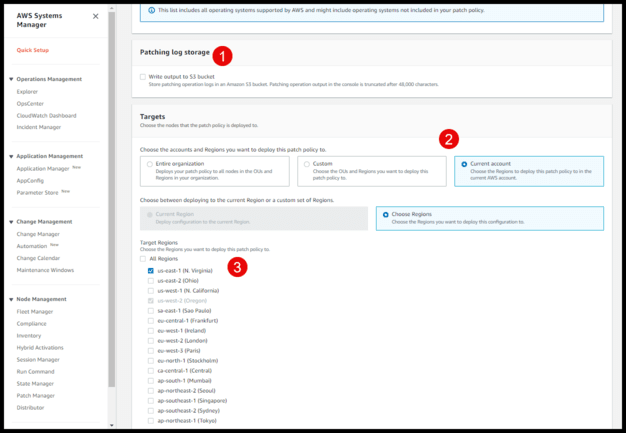
Next options ask if you want to store your logs in S3 (console can only store 48,000 characters), and how broad you want the patching policy to control.
I chose not to store patch logs in S3. I'm limiting my scope by region. Choose what's right for your company.
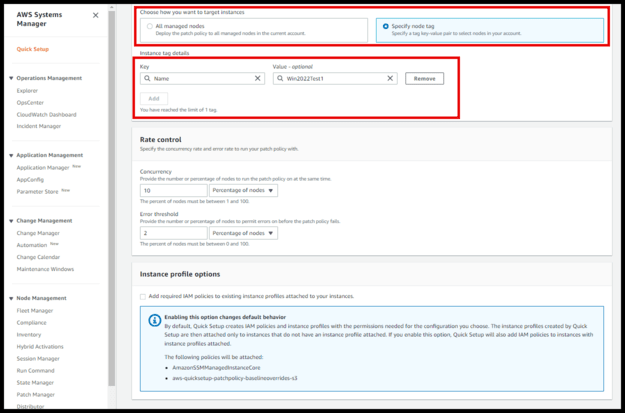
Almost done. Now we need to choose how to target instances. you can specify all instances available or as I’ve done below, choose a tag you can use for all instances that you want to target. I’ve left Rate Control as default and there’s no reason to add additional IAM policies.
I used the name of the instance for my tag, but you could use something like Key=PatchPolicy, Value=Yes
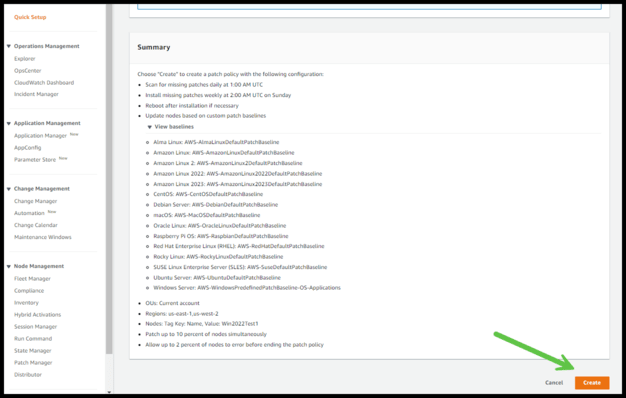
We’re finally done with our patch policy setup. Review what you’ve set then hit Create.
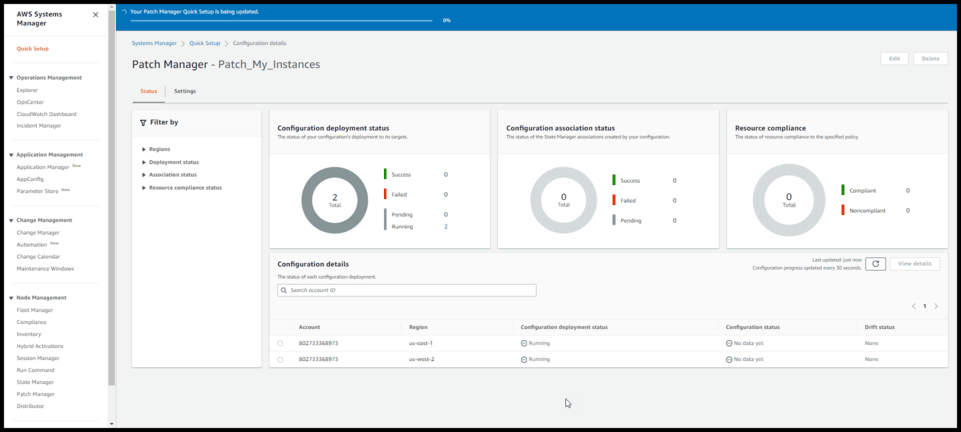
After hitting the create button, your patch policy will build out a console similar to the one below.
This is what my patch manager console looks like after 24 hours. You’ll notice that the policy was applied.
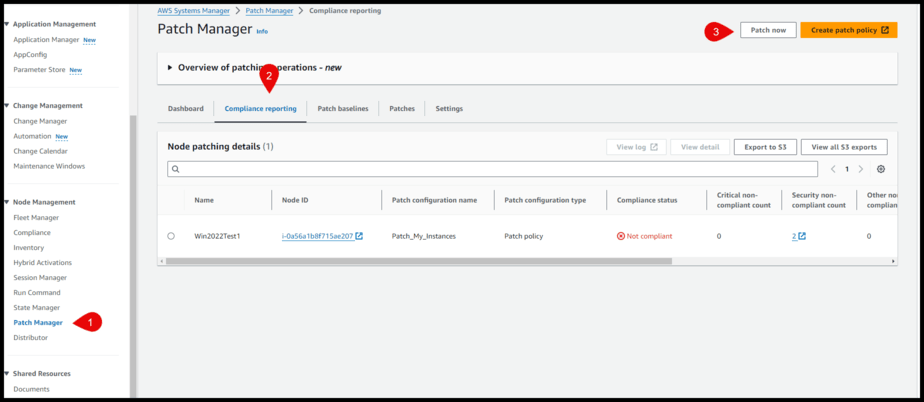
If you navigate out and back to Patch Manager you’ll see a tab for Compliance Reporting. Open that and you should see your EC2 instances that the policy was applied to. Notice my test server is non-compliant. From here I can wait until the updates are installed or I can manually install them by hitting the “Patch Now” button. Since this is a demo I’m going to patch now, but you can wait until the schedule automatically installs the updates.
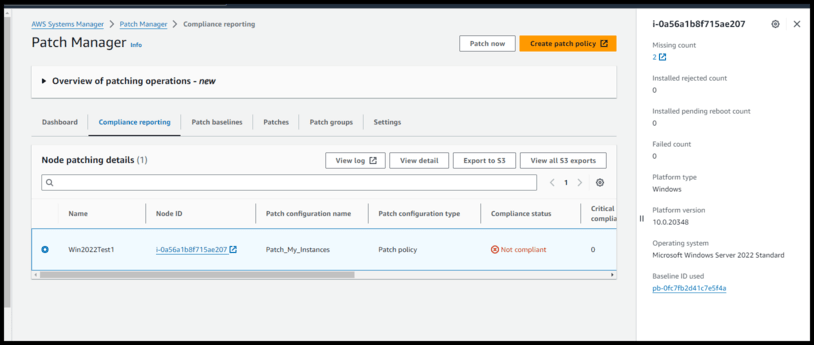
While I’m waiting for the updates to install I selected the EC2 instance in my patch policy. When you select the server you’ll get more information about the status on that server.
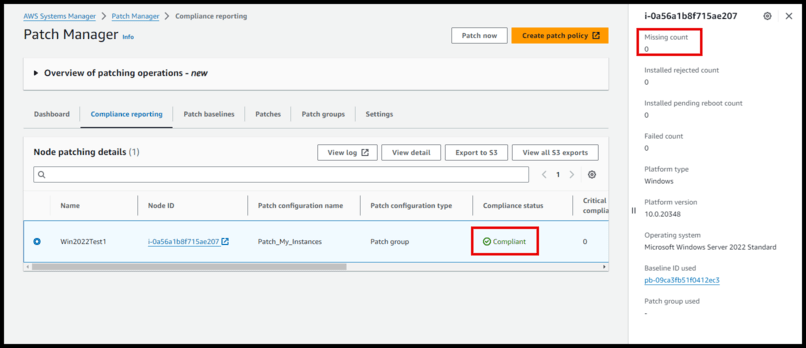
Here you go. Our updates got installed. Check the highlighted boxes. We’re now compliant and not missing any security updates.
In this blog post we used AWS Patch Manager to create a patch policy with the necessary settings to auto patch our Windows server with the necessary security updates. We then monitored our patch policy until the patches were applied.
One thing you need to be aware of is that the patches installed using this method will not show up in the updates history on the server that has been patched. If you need more detail about what updates were installed you can select the server you are patching and choose “View log” or “View detail”.
I hope this post provided the information you need to automate your Windows update patching.