

Most Network Administrators use Bitlocker to secure their laptops and PCs. It’s built into Windows and best of all it’s free. (NOTE: Bitlocker is not included with Windows 10/11 Home.) It’s fairly easy to setup, but one problem is saving the recovery key. It’s a very long string of numbers and if you loose it you can forget about getting back into your system.
In this post I’ll show you how to modify Active Directory to allow for saving Bitlocker recovery keys and use a nifty Powershell script to enable Bitlocker.
Agenda:
-
- Requirements
-
- Add BitLocker tab to AD
-
- Create Group Policy Object to allow for saving Bitlocker info to AD
-
- Run Powershell script to enable BitLocker
Requirements:
-
- AD functional level 2012 R2 or higher
-
- AD Domain controller
-
- Windows 10 client attached to domain
-
- Administrator permissions on Windows 10 client
-
- Computer with a TPM chip enabled
Adding BitLocker Tab To Active Directory
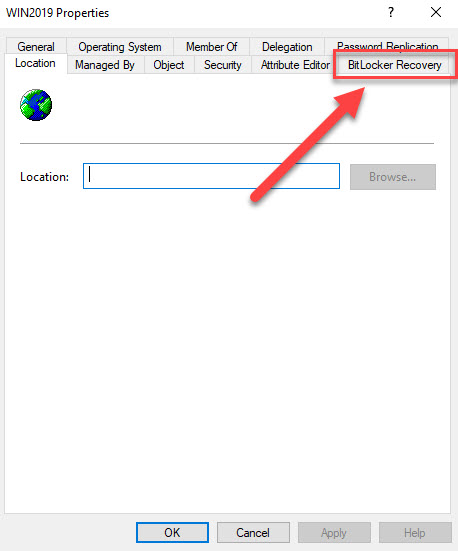
By default Active Directory is not setup to save Bitlocker information. To find out if your AD is already setup to save Bitlocker information open “Active Directory Users and Computers” and find a computer object. Then check the properties of that object. If you see the Bitlocker Recovery tab you can skip this step.
Follow these steps to add the tab to your AD environment.
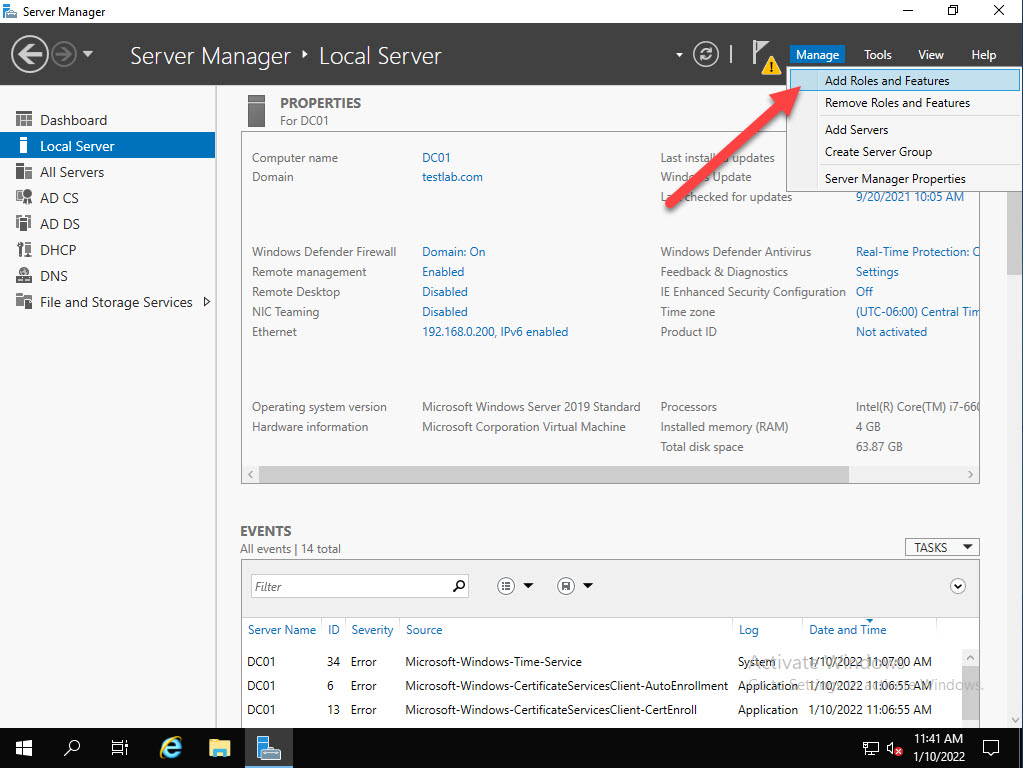
From Server Manager on the Domain controller open Manage and choose Add Roles and Features.
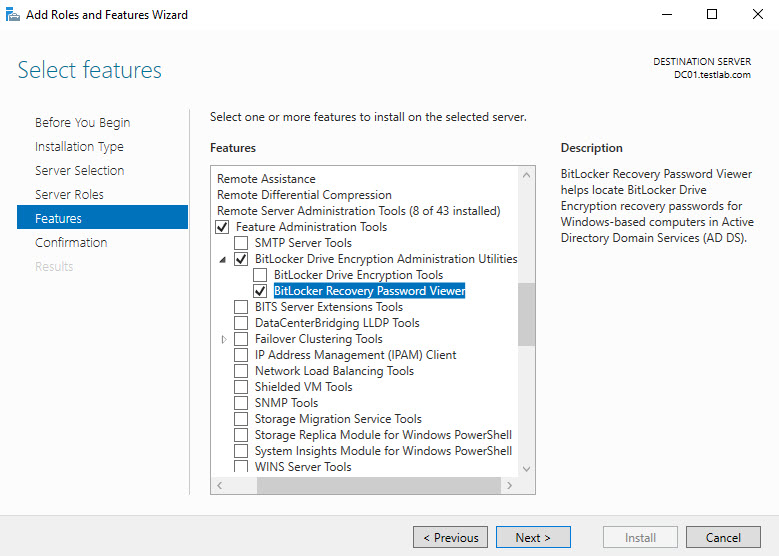
Click next until you get to Features. Select Remote Server Administration Tools, expand Feature Administration Tools, expand BitLocker Drive Encryption Administration Utilities and select BitLocker Recovery Password Viewer and click Next
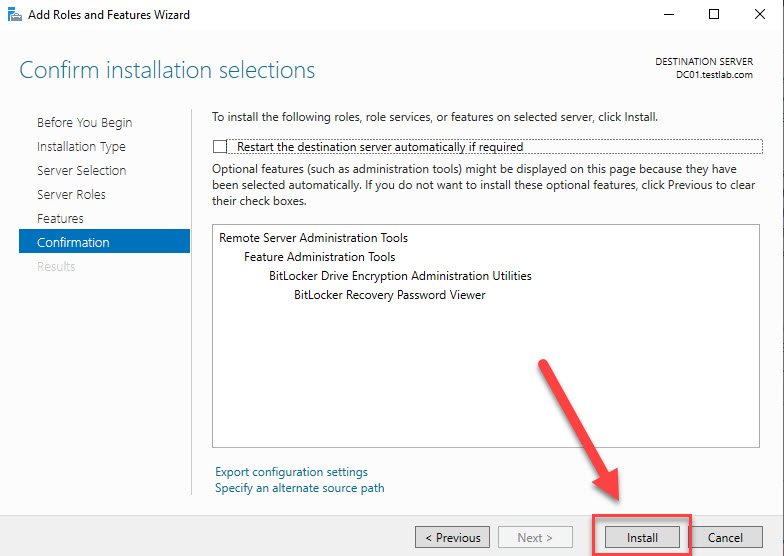
click Install
After the feature finishes installing, open Active Directory Users and Computers and open the properties of a computer object. You should now see the BitLocker Recovery tab.

Now that we can see the BitLocker tab we also need to make a Group Policy change to allow for Bitlocker information to be stored in Active Directory.
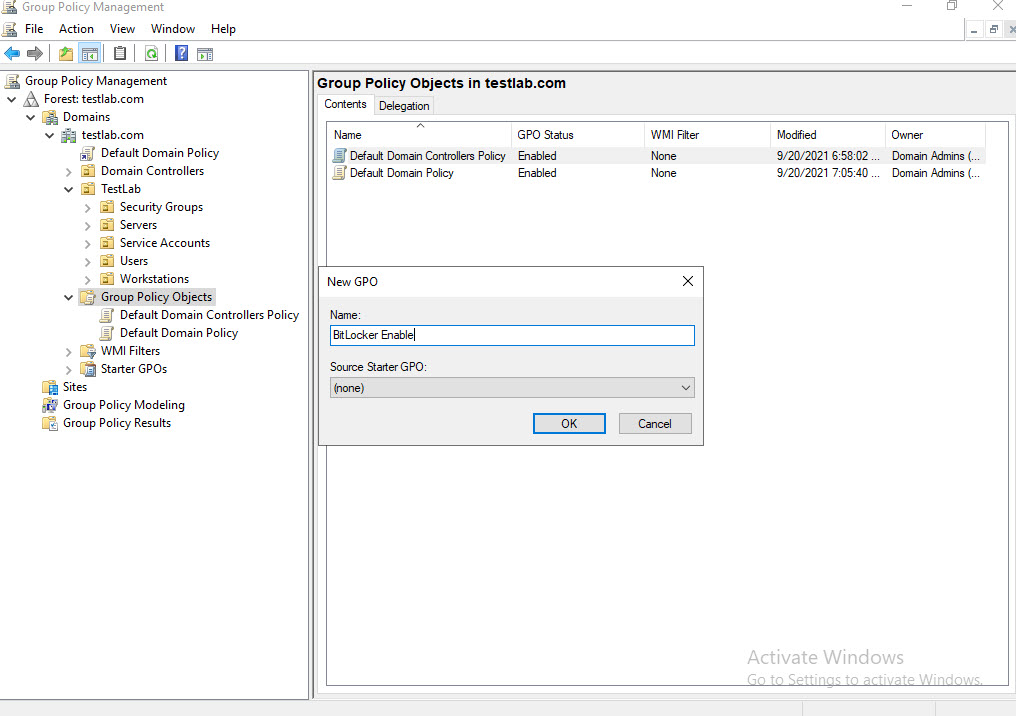
Create Group Policy Object To Allow For Saving Bitlocker Info To AD
Open Group Policy Management Editor and create a new GPO.
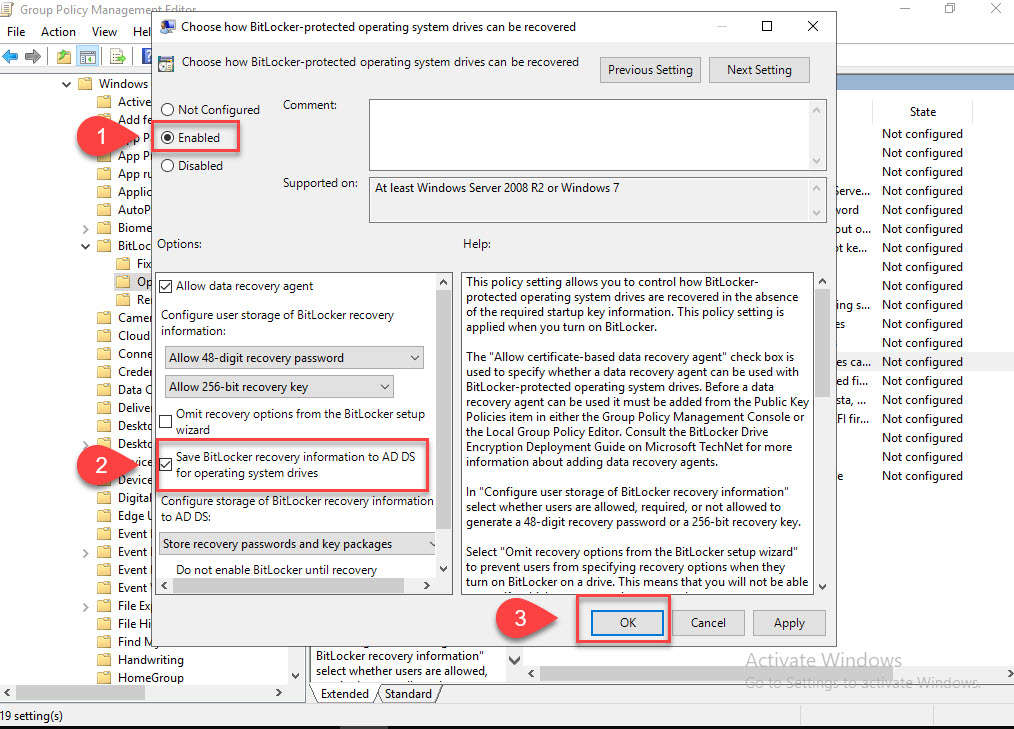
Edit the newly created GPO and navigate to Computer Configuration > Policies > Administrative Templates > Windows Components > BitLocker Drive Encryption > Operating System Drives > Choose how BitLocker-protected operating system drive can be recovered. Now enable and make sure “Save BitLocker recovery information to AD DS for operating system drives” is checked.
Run Powershell Script To Enable BitLocker
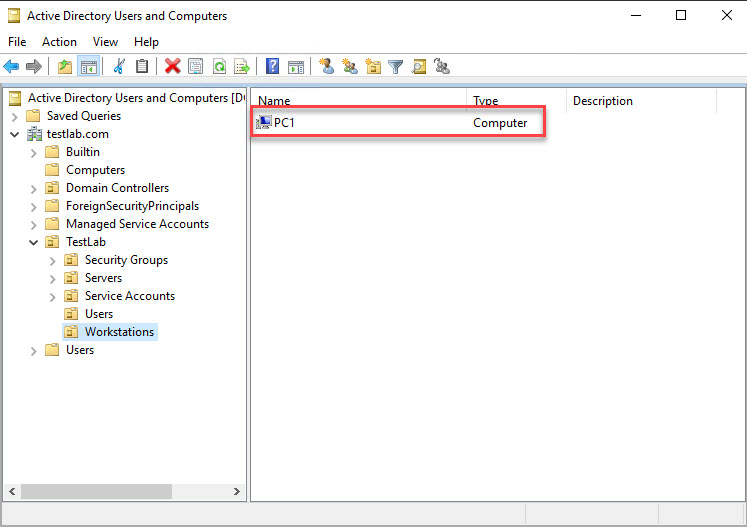
We’re so close! Before we enable bitlocker and add the recovery key to AD we need to move our PC/laptop to the OU (organizational unit), we linked our BitLocker GPO to. In my case it’s the Workstations OU under my TestLab OU.
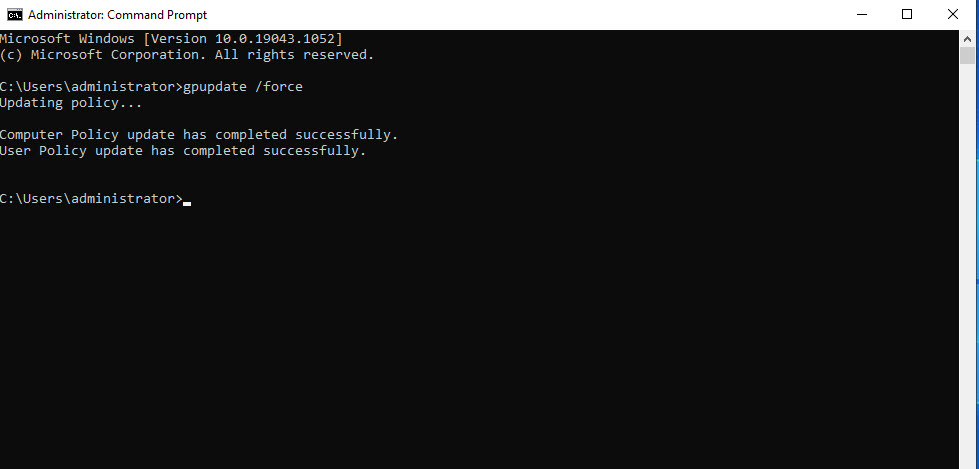
After you’ve moved the computer to the correct OU we need to update the group policy settings on the client computer. Open a command prompt on the client and run “gpudate /force”.
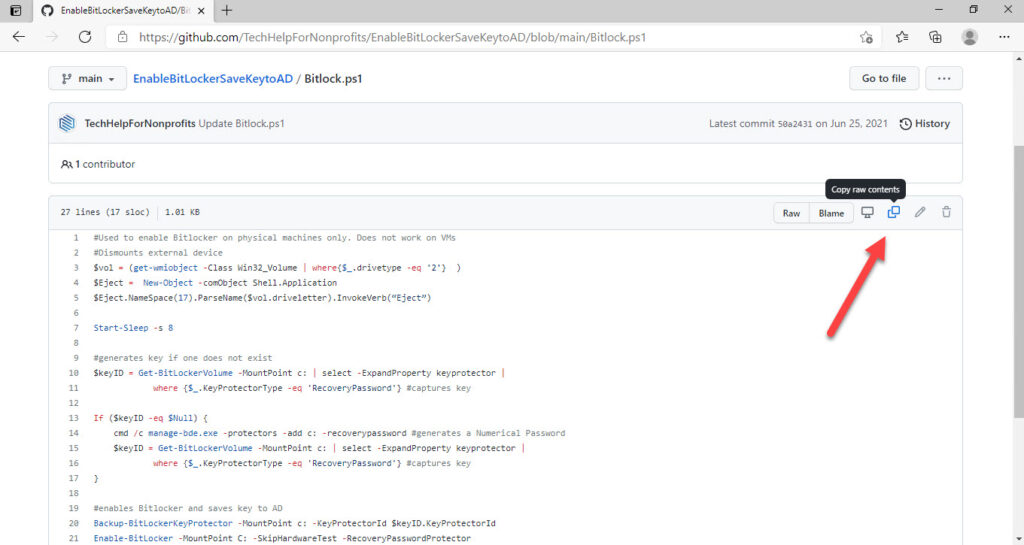
Now let’s grab the Powershell script we need to enable BitLocker. Navigate to: https://github.com/TechHelpForNonprofits/EnableBitLockerSaveKeytoAD from client computer and open BitLocker.ps1 (unless you’re running this on a virtual machine then open BitLocker-VM.ps1.)

Choose to copy the script.
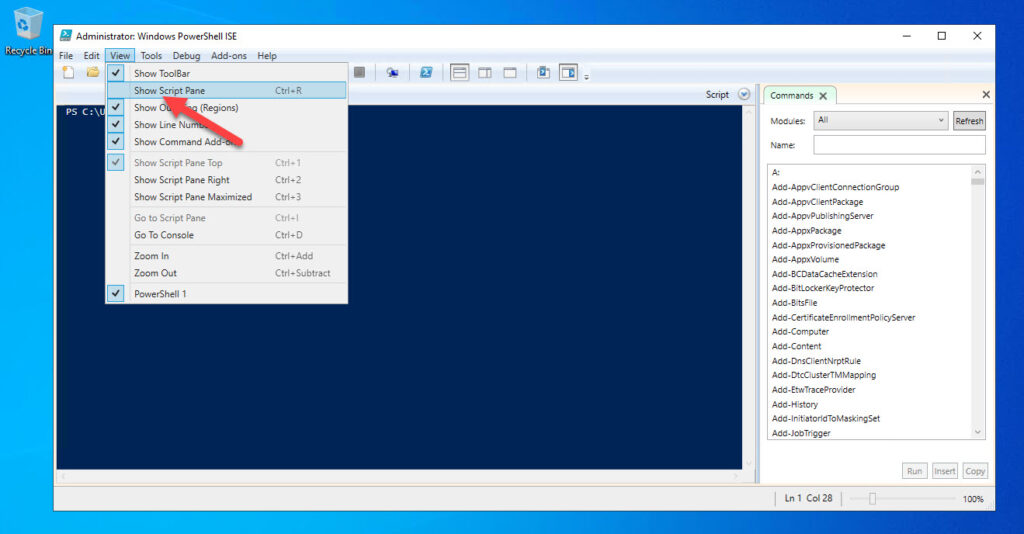
Open Powershell ISE on the client computer, choose View then check Show Script Pane.
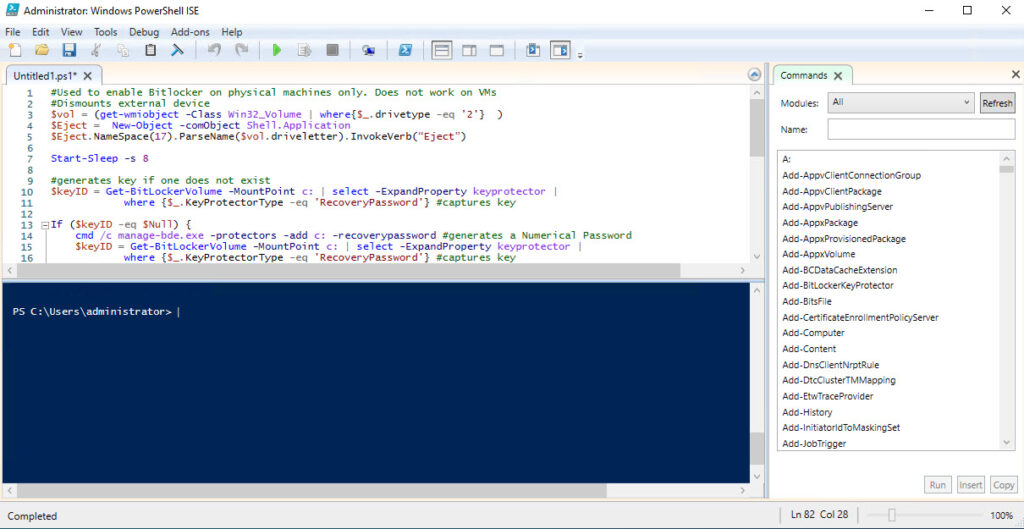
Now that we have the script pane available let’s paste the code from GitHub. After you paste the code in let’s run it.
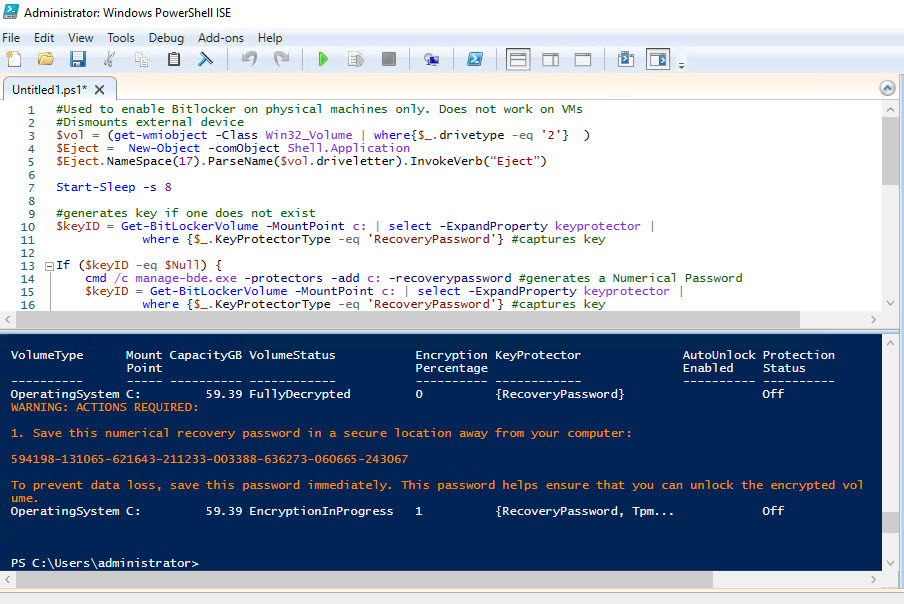
Here is what you should see after you run the script. (Note, if you get an error about “cannot call a method” you can disregard that. That’s there just in case you forget to eject a USB stick.) NOTE: (If you get an error about the execution policy, run this before running the script. “Set-ExecutionPolicy -ExecutionPolicy Bypass”)
Let’s check to see if it worked by running Manage Bitlocker from search bar.
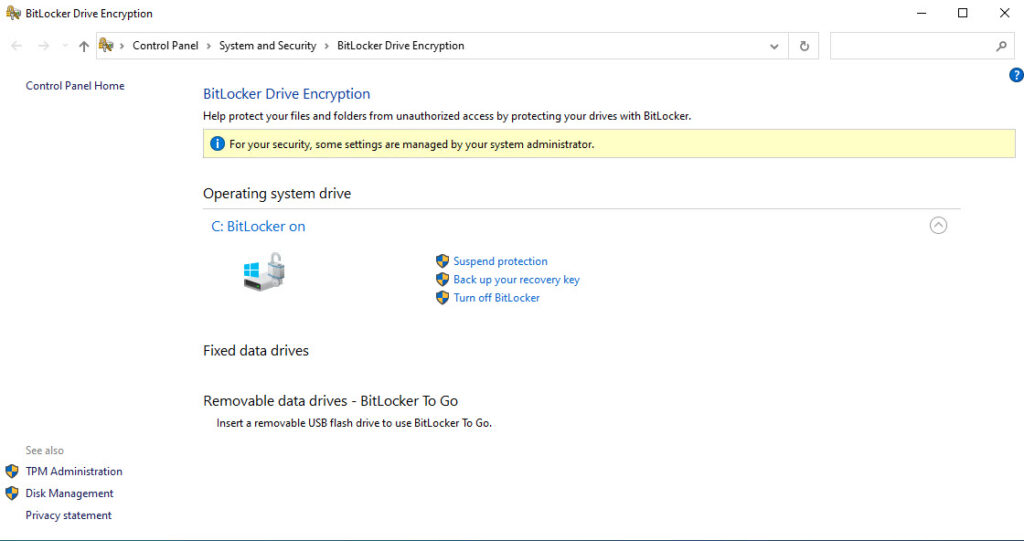
Okay, Bitlocker is now active. Now the real test is to check Active Directory Users and Computers. Navigate to the computer in AD and choose Properties. Open the BitLocker Recovery tab.
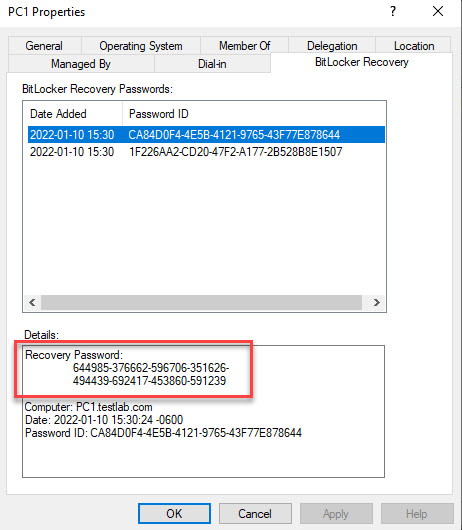
It worked. You’ll noticed there are two entries. (The latest recovery key will be the top one.)
In this post we enabled the BitLocker tab in Active Directory, Created a Group Policy Object to allow Bitlocker to save in Active Directory and the last step was to run a Powershell script to turn on Bitlocker and save the recovery key to AD.
I hope this post was helpful. I know that AD is being replaced by Azure AD, but a lot of networks are setup in hybrid mode so AD ain’t go’in nowhere!
Hi i think that i saw you visited my web site thus i came to Return the favore Im attempting to find things to enhance my siteI suppose its ok to use a few of your ideas
Thanks. Just noticed my images are broken.